Posts

Showing posts from 2017

How to scan shiny surfaces

Image
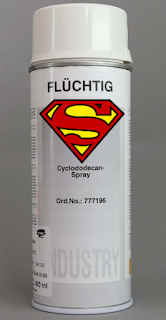
Windows, glasses, jewelry, metallic surfaces.. everything transparent, reflective or shiny... the eternal enemy of photogrammetry. Luckily, there are heroes which can fight these villains. They might be inconspicuous, blended within the crowd. However, they are always there to help in times of need. These heroes are called....wait for it... coating sprays! For those who are new to photogrammetry and are wondering why is it such a nightmare to scan transparent, reflective or shiny surfaces, the explanation is quite easy. Photogrammetry works based on exact positions of reference points on certain surface. Thus, with these types of objects, the surface has no texture/detail which software can pick up on and the reflection is changing as you move, hence the reference points cannot be defined. Imagine a glass... you don't only see reflection of yourself and the surrounding environment, but you see through the glass and see the distorted version of what is behind the glass. Bu

How to create a video in the RealityCapture

Image
Showcase of RealityCapture fancy features continues. Next one on the list is a really great, a little bit hidden tool, called Screen Grabber. Screen grabber is a tool which allows you to record a video during workflow. I believe that many of you have already created some video showing some sort of workflow. There are many tools which allows you to create such video, however, what is really great in this case, is that the tool is directly in the software, so you  do need to look for any external applications. Now, how is it hidden you ask ? In order to run the screen grabber you need to use shortcut Once you press the key you will hear the sound, which indicates that the recording has started. Make sure though that you have set up output folder for the video. Then you just are just simply recording your work. Once you are finished you press the same keys again and recording stops. What I strongly recommend is to try start/stop the video and listen to the sound. As it ma

How to never miss a spot again with inspection tool. Part 2.

Image
In my previous post, I have introduced to you Inspection tool. One of the cool features of RealityCapture. In this post I wanted to move to another cool tool. :)  However, I could not do that to you without telling you one more cool trick that can be done with Inspection tool. What I said to you before is how the tool is beneficial, especially, when you have your laptop with you and you can see whether you have missed some spot on your object and if you see that something is missing you can take more pictures.  But what if you don't have your laptop or cannot go back to take more pictures?  Don't worry, there is something you can try and it might help you.  When you use inspection tool, what is actually happening is that the tool is displaying matches between cameras that were computed during alignment.  In order to better understand, lets start from beginning. When you align your images within the RC, what happens is that the software connects same points toge

How to never miss a spot again with inspection tool.

Image
Let's get technical! Because, I am very good in keeping my promises, we are going to focus on one very useful tool in RealityCapture software. Imagine scenario: You have decided that you are going to museum and that you have obtained permission to photograph one object, but you have to do it within one day. After that, you won't be allowed to photograph it ever again. Now, it can go either very well, because you have read my previous post about taking photos and now your are Pros:) Or, it can go really wrong, and you miss some spots of the photographed object and you discover it only after you are at your home or office, sipping your coffee, uploading photos and seeing huge hole in your 3D model. Does the coffee have taste of regret? I bet it does. However, luckily, with RC you can avoid this horrific scenario. The solution to this problem is Inspection tool. I have already mentioned this tool in my previous post, but now I want to give you more details, so you re

How to take photographs in order to achieve the best possible results.

Image
I have decided that I am going to give you some useful tips on how to take photos for photogrammetry, so you are able to get the best possible results. Not that I am already a professional photographer. Consider this to be do’s and don’ts when taking photos. Basically, it is the summary of what I have learnt from various sources, what was told to me and my personal experience.  It is actually pretty easy. There are several rules and if you stick to them you will get high detailed 3D models.  First of all, you can really go crazy when it comes to number of images. Honestly, why would you say to yourself: “100 images? That is enough!” Just take as many as you want, you will thank me for this advice when you will be creating your model. Just to give you a hint, why is it better to take more pictures, look at this picture. This is what happens when you do not take enough photos. Pretty? Well, not really. OK, this migh

Can you create good 3D model from images taken with your phone? My personal experiment. Phone vs.Camera.

Image
Let's start with fun fact. Did you know that when you write into Google that you were thinking hard about something, one of the first results is " Why Procrastinators Procrastinate"? :) Not that it is the reason, why I am posting this a bit later than expected.  No, the reason why I am posting this a bit later, is that I have something special for you. But, in order to make it up to you I have created not one, but 2 models. I have seen on the Internet that many people just take photos for their 3D model with phone, and I have started to wonder, whether it is really that simple. That is why I have decided that I will create two 3D models of the same object. One with photos from my phone, one from my camera and  then compare them. Nowadays, the cameras in smartphones are pretty good, mine has 8mpx and I think that it is sufficient, thus I was really curious about the result. When taking photos with your phone, the principles are same as with

Uploading to Sketchfab (Updated - Sketchfab now supports audio)

Image
As I have promised in my previous post, now I am going to write about uploading your 3D models to Sketchfab. Sketchfab is website used to display and share 3D content online. And it is really cool. Just go there now and check it for yourself.  Done? Cool, right? Now, what is even better, is that from RealityCapture you can directly upload your 3D models to Sketchfab. Well, if you are first time user like me, you will need to register first. But after that, it is just few clicks away. What you need to do right before you upload: 1. Give your model a name 2. Write something about it . People are always interested in how many photos you have used and how long it took. What is very helpful is that when you are uploading your model, RealityCapture will add this information automatically. 3. Add tags. The more tags, the easier it will be to find your 3D model and more people will see it.  If  you tick "Publish the model after upload" your model will

How I created my first 3D model. From an average lady to 3D modeling pro in one day (Well, maybe not a pro…)

Image
Recently, I have been given a task to create my own 3D model, and because I ain't no weakling, I am not only going to do it, I am also going to write about it. Hence, I have started this blog in order to show the world, how fast can somebody create their first 3D model, from photos. Basically, my plan is to each week create one new 3D model and share it so together we can see my progress. And what you know, maybe I will become a pro in no time, and maybe not...But that is why we are here. To watch me learn. And who knows? Maybe this might be helpful to somebody who is same beginner as I am. So, are you excited as much as I am? I knew it! I would call myself a "Guinea pig" at Capturing Reality.  Because, let's face it, who else can provide you with the information about how easy the user interface actually is, if not somebody who has never done anything like this before and knows very little about the subject of photogrammetry and 3D modeling.(me) As al