How to scan shiny surface part 2: Challenge time
I am back!
It's been quite a while, but what better time to start writing again than right after we have won an award for our company’s growth, product quality, and innovation, as well as social contribution.
(Shameless bragging)
I am pretty sure that you have seen the award across the social media, but in case you are living in a cave (duh!) and this news hasn't reach you, here is how it looks:
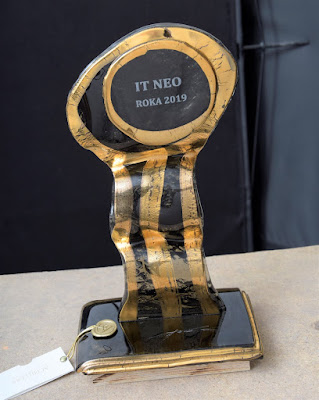
Beauty, isn't she? (Yes, it is she)
Now, do you remember the previous tutorial on scanning shiny surfaces? Well, this time I have decided to take it one step further and scan our gorgeous prize.
Pure see-through glass, with golden parts. What could possibly go wrong, once we put aside the fact that it is in fact nightmare for photogrammetry...
I handled the golden statue, so why not this?
OK, let's start then.
What do we need:
1. Camera - in my case I have used Nikon D5300,
2. Coating spray,
3. Good lighting conditions,
4. An award for company’s growth, product quality, and innovation, as well as social contribution.
(Easy, right?)
Here is how my set up looked like:

I have decided for a black background as after few tests this turn out to work the most. (One wouldn't believe this.)
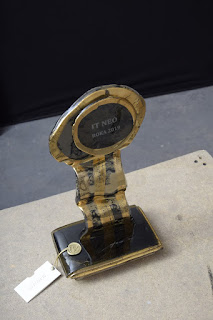
The capturing was done indoors with two studio lights. The lights were aimed towards white ceiling to create diffused light and avoid as many shadows as possible.
Moreover, I shot underexposed photos to reduce the light reflections to minimum
The best and easiest, however, would be to shoot it outdoors during the daylight on an overcast day. However, as goes the proverb "after a battle, everyone is a general."
Then, the question was, what should I put it on? I wanted to capture the edges of the base hence I had to lift it a bit.
This is were very smart custom set up came in handy.
You need:
 Why you need this, you ask? Well the wood lifted the base to sufficient height, the cardboard evened out the uneven surface and the black paper created a background for the transparent base of the award.
Then just two wiggly tables and the custom set up is ready.
After everything was prepared I have shot 1 full circle around the award, to capture it as a whole from approx. 1 meter distance, slightly from the top. Then I have done one middle circle and then from the bottom.
 Then I focused on the details as it is quite complex object. A lot of my focus was on the base as well as the back of it.
I may have gone a bit overboard with photos, but as RealityCapture can handle any amount, why not.
Better to have more photos, than to be sorry that you have missed some parts.
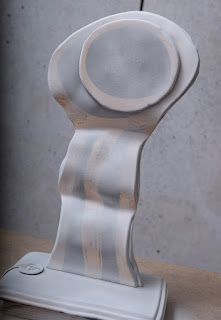
Once I considered this part of capturing done, I have used coating spray.
If you are worried about using coating spray, don't be. It is really very easy to do that and it dissolved nicely overnight.
Then I just shot another loops around the award in the same manner as before.
And because I am very smart, I had my laptop with me and once the shooting was done and aligned it directly on the spot to see whether I have covered everything.
Now let's pause for a minute to drop some knowledge.
By now we all know that the shiny, reflective objects are nightmare for photogrammetry.
That is why the coating spray (or mud, dust, corn starch etc.) is used.
Simply speaking it turns shiny object to matte.
This helps to create the model with correct geometry. However, for correct textures, you need to capture set of photos with the original color of the surface/object.
However, just to recapitulate:
1. Create two sets of images
- Original
- Sprayed
2. Add to RealityCapture "Original" images
3. Export images list: eg. original.images - this helps you identify this set of photos later for creating texture
4. Add to RealityCapture " Sprayed" images
5. Align altogether
Now, previously I used just the default settings in RealityCapture for alignment, but this time the object was more tricky and not all images were aligned together. Therefore, I tried to play a bit with the alignment settings.


6. Import image list: original.images as "Image selection"
7. In the "Selected inputs" set "Enable meshing" to FALSE -> RC will use just the sprayed images for meshing
8. Reconstruction - done in Normal detail


9. Simplify
10. Multiselect all images and set "Enable texturing and coloring" to FALSE
11. Select only several images that show the object from all sides -> set "Enable texturing and coloring" to TRUE
12. Run texturing -> only those images will be used for texture
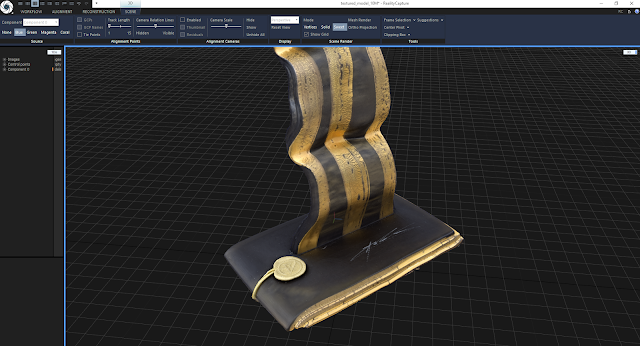
And here is the beauty in its full glory!
The overall processing time was 1h 26min and 940 photos were used.


Finally, one more shameless bragging.
If you wish to become part of our team, and work for award-winning company, (As one wise woman said: "The only thing I'm not good at is modesty, because I'm great at it!") then definitely check out our website and see open positions, so you can have a job that you actually like and enjoy. ( I hope my bosses are reading this, Christmas bonuses are around the corner).
It's been quite a while, but what better time to start writing again than right after we have won an award for our company’s growth, product quality, and innovation, as well as social contribution.
(Shameless bragging)
I am pretty sure that you have seen the award across the social media, but in case you are living in a cave (duh!) and this news hasn't reach you, here is how it looks:

Beauty, isn't she? (Yes, it is she)
Now, do you remember the previous tutorial on scanning shiny surfaces? Well, this time I have decided to take it one step further and scan our gorgeous prize.
Pure see-through glass, with golden parts. What could possibly go wrong, once we put aside the fact that it is in fact nightmare for photogrammetry...
I handled the golden statue, so why not this?
OK, let's start then.
What do we need:
1. Camera - in my case I have used Nikon D5300,
2. Coating spray,
3. Good lighting conditions,
4. An award for company’s growth, product quality, and innovation, as well as social contribution.
(Easy, right?)
Here is how my set up looked like:

Capturing
As mentioned before, the award is pretty much transparent. Hence, I had to figure out what could be the background to create features that RealityCapture can detect.I have decided for a black background as after few tests this turn out to work the most. (One wouldn't believe this.)

The capturing was done indoors with two studio lights. The lights were aimed towards white ceiling to create diffused light and avoid as many shadows as possible.
Moreover, I shot underexposed photos to reduce the light reflections to minimum
The best and easiest, however, would be to shoot it outdoors during the daylight on an overcast day. However, as goes the proverb "after a battle, everyone is a general."
Then, the question was, what should I put it on? I wanted to capture the edges of the base hence I had to lift it a bit.
This is were very smart custom set up came in handy.
You need:
- 2 pieces of wood,
- a piece of cardboard,
- a piece of black paper.
 Why you need this, you ask? Well the wood lifted the base to sufficient height, the cardboard evened out the uneven surface and the black paper created a background for the transparent base of the award.
Then just two wiggly tables and the custom set up is ready.
After everything was prepared I have shot 1 full circle around the award, to capture it as a whole from approx. 1 meter distance, slightly from the top. Then I have done one middle circle and then from the bottom.
 Then I focused on the details as it is quite complex object. A lot of my focus was on the base as well as the back of it.
I may have gone a bit overboard with photos, but as RealityCapture can handle any amount, why not.
Better to have more photos, than to be sorry that you have missed some parts.
Once I considered this part of capturing done, I have used coating spray.
If you are worried about using coating spray, don't be. It is really very easy to do that and it dissolved nicely overnight.
Then I just shot another loops around the award in the same manner as before.
And because I am very smart, I had my laptop with me and once the shooting was done and aligned it directly on the spot to see whether I have covered everything.
Now let's pause for a minute to drop some knowledge.
By now we all know that the shiny, reflective objects are nightmare for photogrammetry.
That is why the coating spray (or mud, dust, corn starch etc.) is used.
Simply speaking it turns shiny object to matte.
This helps to create the model with correct geometry. However, for correct textures, you need to capture set of photos with the original color of the surface/object.
Processing
To read the detailed step by step tutorial, please see my previous blogHowever, just to recapitulate:
1. Create two sets of images
- Original
- Sprayed
2. Add to RealityCapture "Original" images
3. Export images list: eg. original.images - this helps you identify this set of photos later for creating texture
4. Add to RealityCapture " Sprayed" images
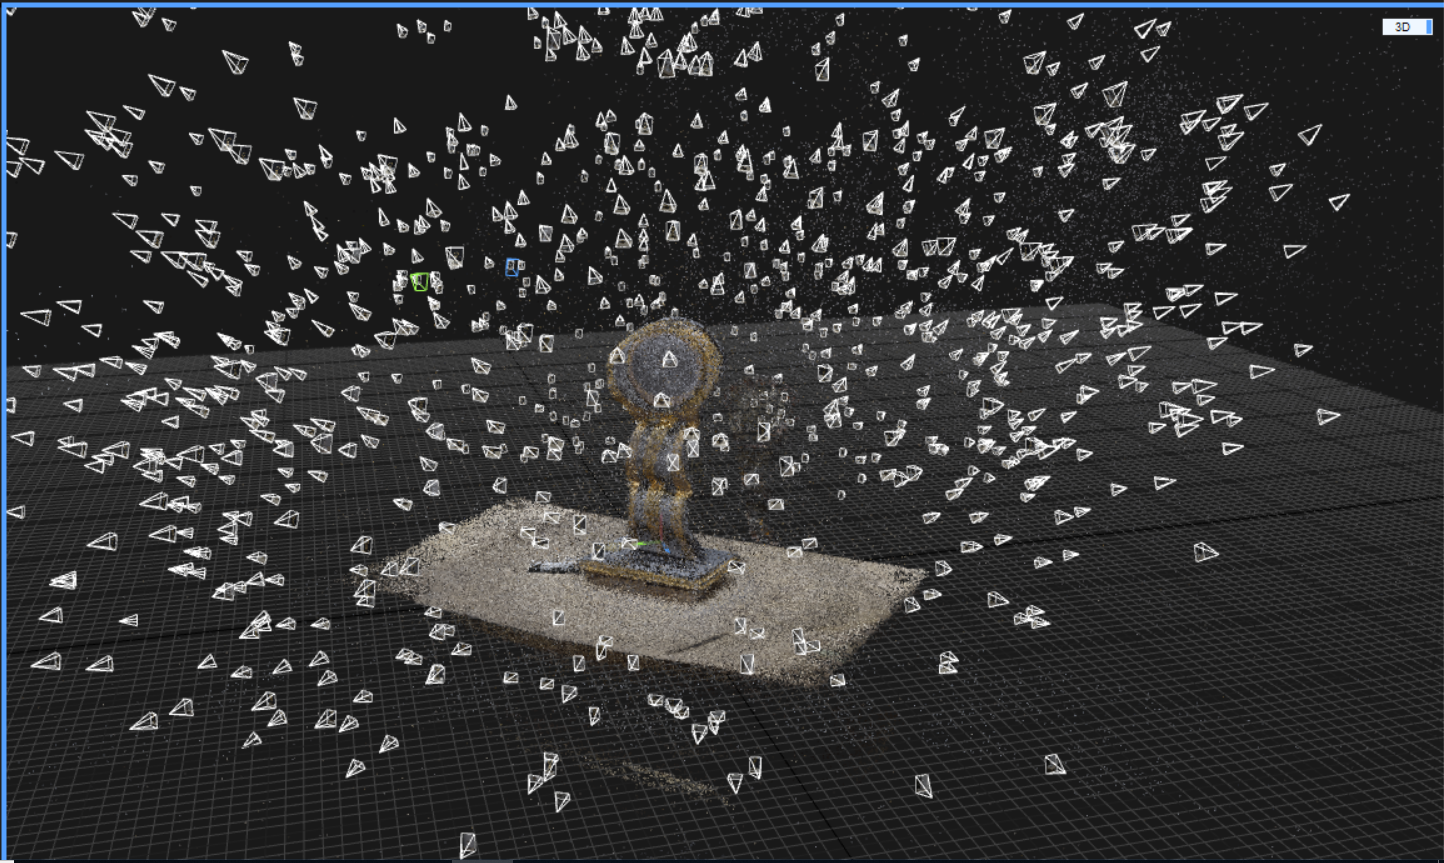
5. Align altogether
Now, previously I used just the default settings in RealityCapture for alignment, but this time the object was more tricky and not all images were aligned together. Therefore, I tried to play a bit with the alignment settings.

- I changed "Image overlap" (not on picture) from Medium to Low. This way you tell RC that the image overlap is not so great and that it should consider larger area of the image.
- I have increased "Max features per image" from 40K to 60K in order to detect more features on each image.
- I have increased "Preselector features" from 10K to 30K to consider more features in the alignment process from the detected ones (above).
- Finally, I have adjusted the "Detector sensitivity" from Medium to High to detect more features on the surfaces with weak texture.
6. Import image list: original.images as "Image selection"
7. In the "Selected inputs" set "Enable meshing" to FALSE -> RC will use just the sprayed images for meshing
8. Reconstruction - done in Normal detail


9. Simplify
10. Multiselect all images and set "Enable texturing and coloring" to FALSE
11. Select only several images that show the object from all sides -> set "Enable texturing and coloring" to TRUE
12. Run texturing -> only those images will be used for texture
And here is the beauty in its full glory!
The overall processing time was 1h 26min and 940 photos were used.


Finally, one more shameless bragging.
If you wish to become part of our team, and work for award-winning company, (As one wise woman said: "The only thing I'm not good at is modesty, because I'm great at it!") then definitely check out our website and see open positions, so you can have a job that you actually like and enjoy. ( I hope my bosses are reading this, Christmas bonuses are around the corner).
Great article Jane! 👩🏻🏫
ReplyDelete